Sunday, January 30, 2011

Vegetarian Curried Lentel Soup....

After all the blustering about homemade stocks this one calls for water.  I love the simplicity of this soup.  Ready in only about 60 minutes.  Vegetarian, delicious, simple, flavorful.  Add any miscellaneous veggies you have hanging around in the refrigerator.  Feel free to add leftover rice or barley. 

Here we go...
First and foremost, you have to sort through the dried lentils.  You will find a few not so pretty ones but also be looking for small debris like stones.  Rinse well.
Next finely chop 1/2 cup each celery, carrots, and onion.  Add to your heavy soup pot over medium heat with a couple of tablespoons of olive oil.  Saute for about 10 minutes.
Add 4 large cloves of minced garlic and cook another minute.
Veggies should look like this....
Add the water, salt, and pepper, and begin to simmer over medium heat.  The lentils should cook in about 30-40 minutes.  Once the lentils are soft, put the chick peas, lemon juice, water, and parsley into a food processor and process until smooth.
Add to the soup....
Enjoy with crusty french bread or corn muffins (recipe below).  YUMMY!

Curried Lentil Soup

2 tablespoons olive oil
½ cup diced celery
½ cup diced carrot
½ cup diced onion
4 large cloves garlic, minced
9 cups water
1 tablespoon curry powder
2 cups lentils, sorted and rinsed
1 15 ounce can chick peas, drained and rinsed
2 tablespoons lemon juice
¼ cup water
¼ cup parsley
1 teaspoon salt, or to taste
½ teaspoon pepper

1) Heat a heavy and large soup pot over medium heat. Add olive oil. Add celery, carrot, and onion. Sauté for about 10 minutes or until vegetables are soft. Add garlic and cook another minute.
2) Add water, curry powder, and rinsed lentils. Simmer for 35-45 minutes or until lentils are soft. If the water is getting low, add a cup at a time. You want it to be more stew-like. Taste the lentils after about 30 minutes of cooking for doneness.
3) Put the chick peas, lemon juice, ¼ cup water, and parsley into food processor. Process until smooth. Add to the soup when the lentils are done. Serves 8.
*If you do not have a food processor, add a cup of prepared hummus.
*If you don't care for curry, simply omit. 

Corn Muffins with Ceddar Cheese and Chives.....

Boy, look at the background in this picture!  I took this last summer....I can't wait to take my pictures on the deck again!  I love that you can see Ryan's ball in the back of the yard.  I'm so easily distracted!!!

This muffin is outstanding with most any soup creation you come up with.  They go together in about 10 minutes and bake for only about 17.  These round out your soup into a hearty,  pleasing supper.

Corn Muffins with Cheddar Cheese and Chives

1 ¼ cups flour
¾ cup yellow corn meal
1/2  cup sugar
2 teaspoons baking powder
1 teaspoon salt
½ cup shredded cheddar cheese
3 tablespoons minced chives
3/4 cup milk
¼ cup sour cream or plain non fat yogurt
¼ cup vegetable oil
1 beaten egg

1) Preheat oven to 350’. Line a twelve count muffin pan with paper liners and coat with cooking spray. Set aside.
2) In a large bowl, add flour through chives, mix to blend.
3) Into a 2 cup measure, measure milk, oil, and add egg. Beat slightly.  Add sour cream or yogurt and give a quick mix.
4) Make a well in the dry ingredients and add liquid all at once. Mix until just blended. Divide evenly among 12 muffin cups. Bake for 15-17 minutes. Serve immediately. Makes 12 muffins.
*if you don’t have sour cream or plain yogurt, simply substitute ¼ cup of milk.

Enjoy!
Angie

Friday, January 28, 2011

Soups!

Gee, anyone sick of being cold?  In addition to the cold, sick of being sick?  It seems that every time I turn around, someone in the house is sick.  The perfect remedy?  Soup.  The ultimate comfort food when you're sick or healthy.  Piping hot and loaded with goodness.  With or without meat, you choose.  In the next couple of weeks I'll be sharing some of my favorite soup recipes.  In addition, what's soup without a yummy bread side.  How about cheddar corn muffins?  Or an old fashioned buttermilk biscuit?

Have you been saving your chicken bones/carcasses?  There is absolutely NOTHING like making your own chicken soup base.  All you need is a carrot, a stalk of celery, a half an onion, and water. (and chicken bones, of course)  The longer you simmer the better.  If the water gets low, simply add more.  I simmer this concoction for about 4 hours.  Remove the large bones with a slotted spoon.  I strain stock through a sieve to insure that there are no bones or skin left in the stock.

Vegetable stock is equally as simple.  Stash all those asparagus ends you don't use, broccoli stems, or any fresh vegetables you can't use in a timely manner in the freezer.  Dump it all in a pot and cover with water.  Again, add some onion, celery, and carrot.  Simmer for a minimum of 2 hours, do not allow to boil.

If you enjoy rotisserie chicken on occasion, save that carcass.  As always, label and date what you put into the freezer.  If you've got a few pieces of chicken leftover from a dinner, freeze them, they'll work too.

Get ready, we're makin' soup! (and bread:-)

Have a great day!
Angie

Thursday, January 27, 2011

Chicken Vesuvio....


Chicken, potatoes, peas, garlic & herbs, and wine.  Dinner.  This is one of my favorite "one dish" suppers.  Use more garlic if you like, the more the merrier!  

Chicken Vesuvio

4 large russet potatoes, peeled and cut into wedges
1 whole chicken, cut up, excess fat removed
8 large cloves fresh garlic, coarsely chopped
6 sprigs of fresh rosemary coarsely chopped, or 2 tablespoons dried, crush with your fingers
6 sprigs fresh thyme, leaves removed from stem or 2 teaspoons dried, crush with your fingers
2 teaspoons kosher salt or 1 teaspoon table salt
1 teaspoon pepper
4 tablespoons olive oil
2 cups white wine, anything dry would be good
1 lb. frozen petite peas, thawed

1)  Non stick foil line a large cookie sheet with sides.  (you may need two pans depending on the size of your pans)  Set aside.  Preheat oven to 375'. 
2)  Peel and cut potatoes into wedges.  Place in a large bowl and cover with water.  Set aside.
3)  Into a small bowl, combine fresh chopped garlic, chopped rosemary, thyme leaves, and 2 tablespoons of olive oil.
4)  Drain the potatoes and allow them to sit in the drainer for a few minutes.  Blot the drained potatoes with paper towel to remove excess water.  Dump the potatoes on the cookie sheet and add a tablespoon of the garlic/herb mixture and toss to coat.
5)  Gently lift the skin on the chicken pieces and rub the remaining garlic and herbs under the skin.  (Don't worry about the wings.)  Season each piece with a couple of pinches of salt and pepper.  Place on cookie sheet between the potatoes.  Try not to crowd, use another baking sheet if there isn't enough room.  Drizzle with the remaining 2 tablespoons of olive oil.
6)  Roast for 40 minutes, baste with the pan juices occasionally.  After 40 minutes of roasting, add the wine to the pan and roast another 25 minutes. 
7)  Add the peas to the pan and bake another 5 minutes.  Remove from the oven carefully as there is a lot of hot liquid.  Serve with the chicken, potatoes, and peas with the pan juices spooned over.  DE-LISH!  Makes 6 servings.

*Make with all white meat on the bone if you wish.  I do not recommend boneless, skinless chicken.  The chicken will be dry.

Tuesday, January 25, 2011

Caramelized Cabbage....

This is a delicious side dish with a vegetable that is readily available at any time of year.  When you cook the cabbage this way it caramelizes.  Caramelizing brings out the natural sugars in foods so there is a natural sweetness to the dish.  Try tossing with cooked linguine and fresh grated parmesan cheese for a delicious vegetarian main dish.

Caramelized Cabbage

1 small head of cabbage, core removed and thinly sliced
2 tablespoons olive oil
1 tablespoon butter
Salt and pepper
Dried parsley flakes

1)  In a large heavy deep pot, add oil and butter and heat over medium heat.
2)  Add cabbage all at once.  It will seem like a lot of cabbage, don't worry, it really cooks down.  Season with a couple of pinches of salt and pepper.  Stir often.  It will take 20-30 minutes to cook down and get caramelized.  Be careful towards the end of cooking as the sugars will burn easily.  Garnish with a sprinkle of parsely flakes if you wish.  Enjoy!

Saturday, January 22, 2011

Warm Artichoke and Goat Cheese Dip....

I came up with this recipe for my sweet Mother in Law Patricia.   I was thinking I wanted a warm goat cheese dip with artichokes, it turned out great!  It's the perfect combination of creamy goat and cream cheese, artichokes, tomatoes, and garlic.  Topped with yummy bread crumbs, butter, and parmesan.  It's SO GOOD! It goes together in minutes and would be great to serve for any party.  I'm going to make it for the Super Bowl!

Warm Artichoke and Goat Cheese Dip

1 8 oz. package cream cheese, softened
1 can artichokes, drained and chopped
1 tablespoon olive oil
4 plum tomatoes, seeded and diced
3 large cloves garlic, crushed
1 small bunch fresh basil
2 pinches salt
1 pinch pepper
1 4 oz. package goat cheese, crumbled
1/3 cup seasoned bread crumbs
2 tablespoons parmesan cheese
1 tablespoon melted butter
2 teaspoons dried parsley flakes

1) Preheat oven to 375’. You will need a 1 ½ to 2 quart baking dish. Spread cream cheese into the bottom of baking dish. Spread chopped and drained artichokes over cheese. Set aside.
2) In a small sauté pan, heat over medium heat and add olive oil. Add diced tomatoes, cook until soft, about 3 minutes, season with salt and pepper. Add garlic and cook another minute. Add thinly sliced fresh basil and stir to combine. Spread evenly over artichoke layer. Add crumbled goat cheese.
3) In a large measuring cup, melt butter in microwave. Once melted, add bread crumbs and parmesan cheese. Mix well. Sprinkle evenly over the goat cheese layer. Bake for 12-15 minutes. Sprinkle with parsley flakes. Serves 8. Serve with crispy pita chips.

*Try adding cooked chopped shrimp or crab over the tomato/garlic layer....OH BOY!

Wednesday, January 19, 2011

Kung Pao Chicken Legs....

These taste as good as they look!  Oh my gosh, sooooo delicious!  It's the perfect combination of sweet and spicy.  There is so much flavor in the sauce that all you need to serve with is is simple steamed rice and stir fry vegetables.  Spoon extra sauce over the rice and chicken, YUMMY!

Here we go:
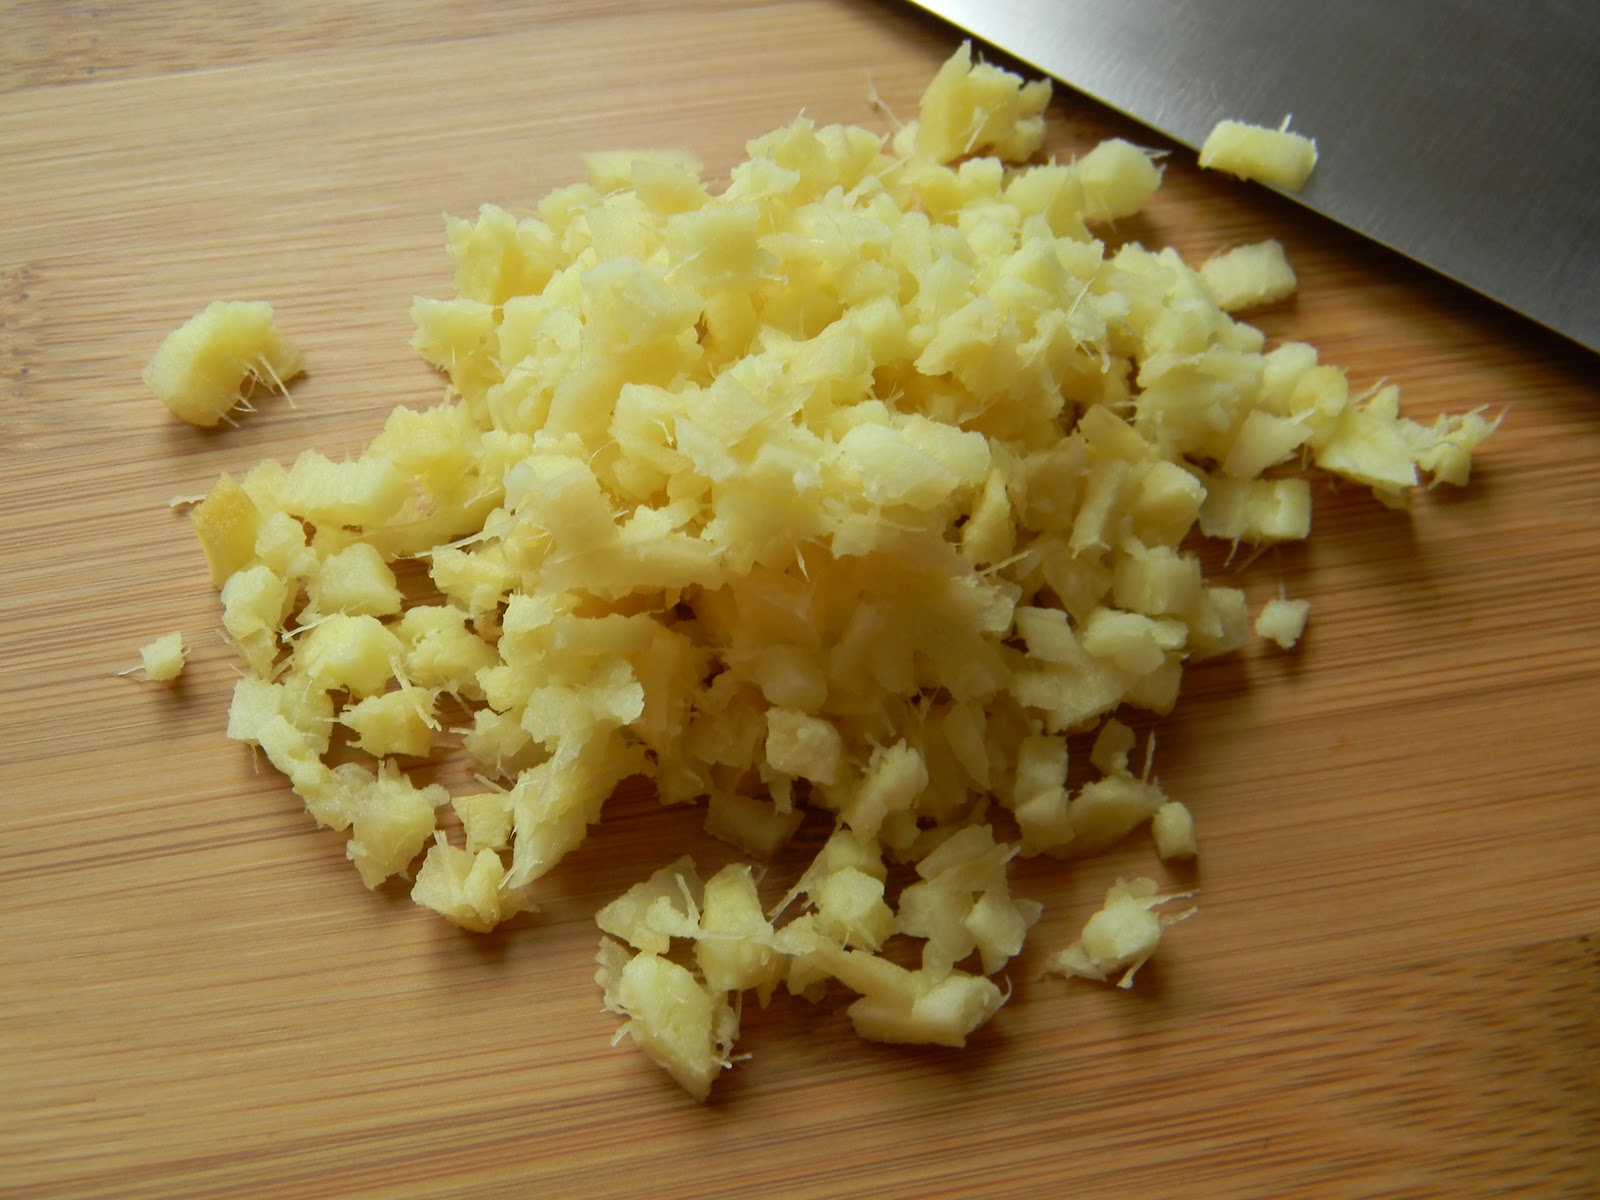
Finely chop 1/4 cup fresh ginger....

And 1/2 cup red onion....
Saute in a tablespoon of canola oil in a medium saucepan for about 5 minutes, stir often. 

Add four large cloves of minced garlic and cook for about one more minute.

Now for liquid ingredients.  Add 1/3 cup of honey.  If you spray your measuring cup with cooking spray it will come out of your measure more easily.
Add 3 tablespoons of mirin.  Mirin is a sweet rice wine used for cooking.  This and the following ingredients can be found in the Asian isle of most grocery stores.
Add 1/4 cup rice vinegar.
Next add 1/2 cup of low sodium soy sauce.  I know it seems like a lot of ingredients.  Trust me, it will be well worth all the measuring.
Add three tablespoons of hoisin sauce.  I love the flavor of this sauce.  It is sweet, salty, and a little spicy.   If you haven't used this sauce before, it is a Chinese dipping sauce and commonly used in Peking Duck. 
Now for some heat.  Add 2 teaspoons (or more if you like) of chili garlic sauce.  This amount will not be too hot. 

Once all the sauce ingredients are in the pan, simmer for about 3 minutes to slightly reduce.  Set aside.

Prepare the chicken legs.  Season generously with salt and pepper, coat with about a tablespoon of canola oil, toss to coat with the oil and seasoning.  Add 3 tablespoons of flour, toss to coat.  Give prepared chicken legs a drizzle once arranged on a non stick foil lined cookie sheet.  "Oven fry" at 400' for about an hour.  For even browning, give them a turn half way through.  Once the chicken is crispy, time for he sauce.  Have your serving platter ready to go.  Dip each leg into the sauce to coat.....

Garnish with chopped peanuts....
And sliced green onions.  Drizzle with a small amount of honey.

Kung Pao Chicken Legs

For the Chicken:
16 chicken legs (about 4 pounds)
1 tablespoon canola oil + more for drizzling
3 tablespoons flour
Salt and pepper

For the Sauce:
1 tablespoon canola oil
¼ cup fresh ginger, minced
½ cup finely chopped red onion
4 large cloves garlic, minced
1/3 cup honey + more for drizzling
3 tablespoons mirin (sweet rice wine)
¼ cup unseasoned rice wine vinegar
½ cup low sodium soy sauce
3 tablespoons hoisin sauce
2 teaspoons hot chili sauce

Garnish:
¼ cup salted roasted peanuts, finely chopped
1 small bunch green onions, thinly sliced

1) Preheat oven to 400’. Non stick foil line a cookie sheet with sides, set aside. Place chicken legs in a large bowl and drizzle with one tablespoon of canola oil. Season generously with salt and pepper. Toss to coat. Sprinkle the flour over the legs and toss to coat. Place on prepared cookie sheet and lightly drizzle with canola oil. Bake for 45 minutes to an hour or until nicely brown and crispy.
2) Place a medium sauce pan over medium heat and add 1 tablespoon canola oil. Once hot add the ginger and red onion. Cook for about 5 minutes, stirring often.
3) Add garlic, cook for about one minute. Add the rest of the sauce ingredients and simmer for about 3 minutes to reduce slightly.
4) Chop the peanuts and slice the green onions.
5) Once the chicken is done, with a tongs dip each chicken leg into sauce to coat. Garnish with the chopped peanuts, green onion, and a light drizzle of honey. Makes 8 servings.

*Serve with steamed rice and simple stir fry vegetables. Spoon extra sauce over chicken, rice and veggies, yummy!
*Substitute chicken wings for the legs for an flavorful and beautiful appetizer.

Monday, January 17, 2011

Past Recipes.....

It is extremely cold here in Chicago.  Makes me want to enjoy friends at MY house so I don't have to get in and out of a cold car!  In any case, I love having my favorite peeps over for delicious comfort foods, not to mention a delightful dessert grand finale.

Have you taken a look at my recipe for Greek Gyros?  Serve up a fresh Greek salad and it's a fabulous dinner for guests yet simple enough for a weeknight supper.  I am making these today and I think if you haven't already, you should try them....they're excellent!  How about Old Fashioned Pot Roast with sour cream mashed potatoes?  I love serving pot roast with a simple Red Cabbage Salad, I think the vinegar dressing cuts the richness of the meat and gravy.  Soooo good!  Lastly, what's not to love about macaroni and cheese.  Try my Ultimate Beefy Mac n Cheese.  Your kids will absolutely flip!

Dessert?  Try my incredibly simple Peach Crisp, use the prepared frozen peaches and a scoop of real vanilla ice cream.  Or try a real crowd pleaser, Texas Sheet Cake.  I love to make this cake because you ice the warm cake, no waiting for it to cool.....I'm can be a bit impatient!  I love to make Banana Cupcakes with Chocolate Frosting, they bake and cool incredibly fast and are so simple to serve. 

What will you be making this week?

I hope you have a wonderful day!
Angie

Saturday, January 15, 2011

A "Greener" Way To Enjoy Fruit Juice.....

For years I bought my fruit juices in half gallon plastic containers.  The boys drink them in no time at all, so we'd go through 4-5 of them a week.   I'd say an average cost of approximately $2.50/half gallon.  In addition to the cost,  that's a lot of plastic in the recycling bin. 

I rediscovered frozen concentrated juices.  Read the labels, some contain high fructose corn syrup, but many do not.  I found orange juice, grape, and apple.  In addition to less plastic, they are much less expensive.  I bought this name brand grape juice at Target for $1.37, so it's a great deal!

Lastly, most juices are far too sweet.  I add an additional can of water when mixing.  Less sugar and it goes farther.

So, less plastic in our precious environment, less money, and less sugar.  LOVE IT!

Have a wonderful weekend~
Angie

Thursday, January 13, 2011

Family Recipes.....

Mom's Homemade Bread...Imagine how my house smells!!!
This is the bread we sprinted home from the bus for....we could smell it a block away...YUM!

I would like to encourage everyone to continue experimenting in the kitchen. I grew up with a Mom that was always trying new things. I think this makes for children who are willing to try unusual foods and broadens their pallet immensely. Additionally, I would hate to see the fine art of cooking and baking be a lost to the next generation. Use those beautiful tried and true family recipes. Pass them on. Why not make a new recipe a family tradition?  It could be the simplest recipe.  We make Gingerbread Cookies every Christmas.  All three boys totally look forward to it.  It's very sweet.

Go ahead, try new things. Who cares if it doesn’t come out perfect. I had many, many flubs throughout the years. And guess what? I still make mistakes. The more you cook, the more comfortable you become in the kitchen. Soon, you’ll be able to experiment with different spices and techniques. You’ll get there. Just like anything else, practice, practice, practice. 

I’d like to suggest one thing that I just loved as a kid. There was nothing like walking into a house that smelled like something delicious. Warm fuzzies.  Bake a batch of  Peanut Butter Chocolate Chip Bars or mix up a batch of Oatmeal Raisin Cookies and refrigerate the dough.  Use whenever you want fresh cookies.  Your house will smell like heaven. This small task is a HUGE memory maker, have fun!

I’ve received many emails from many of you telling me of your successes in the kitchen. I applaud you! I’m thrilled that so many of you are trying new recipes.

Please continue to challenge yourself. Try making Kringle or Cinnamon Rolls.  I've included very detailed instruction for you. 

Have a wonderful day!

Angie

Sunday, January 9, 2011

Oatmeal Raisin Cookies....

I  love a good, old fashioned, chewy oatmeal raisin cookie.  It took my a very long time to perfect this recipe.  The measurements may be a little unusual, but believe me, they're right on.  The key is to carefully measure the dry ingredients.  For the flour, gently spoon into the measuring cup and level off with a knife.  Most recipes call for large eggs, be sure to use them here.  Make this cookie dough a good base for most any kind of cookie you like.  Add chocolate chips, craisins, dried cherries, or any kind of chopped nuts.  For a really different twist, add chocolate covered raisins, now there's an idea!

Oatmeal Raisin Cookies

1 ½ sticks softened butter
¾ cup firmly packed light brown sugar
½ cup + 1 tablespoon sugar
½ cup finely chopped walnuts, optional
2 large eggs
1 teaspoon vanilla
2 ¼ cups +2 tablespoons all purpose flour
1 ½ cups + 2 tablespoons old fashioned oatmeal, uncooked
1 teaspoon salt
1 teaspoon baking soda
1 teaspoon cinnamon
½ cup raisins, soaked in warm water for 30 minutes, drain well

1) Preheat oven to 375’. Parchment line a cookie sheet, set aside.
2) In a large mixing bowl, beat butter. Add brown sugar and white sugar, beat until fluffy. Add eggs and vanilla, beat well. Add walnuts and give a quick mix.
3) In a medium mixing bowl, combine flour, oats, cinnamon, salt, and baking soda.
4) Add half of the flour mixture to the butter mixture, beat until incorporated. Add remaining flour and beat
until well blended. Add drained raisins and mix by hand with a large heavy spoon.
5) Drop by tablespoons onto prepared cookie sheet. I find a medium size cookie scoop the easiest for evenly shaped professional looking cookies. Space 2” apart. Bake for 11-12 minutes. Makes about 3 dozen. For smaller cookies, reduce baking time.

Friday, January 7, 2011

Salmon Patties.....

You may have noticed that I'm on a bit of a fish kick so far this year.  Serving fish can get a bit costly, so I thought I'd share this economical and delicious way to enjoy salmon.  Canned salmon is readily available. Keep some in your pantry for a quick satisfying supper.  Serve with simple rice pilaf and a salad or steamed frozen vegetables.

Here we go....

Preheat your oven to 400' and non stick foil line a cookie sheet.  Add about one tablespoon of olive oil to the pan and spread to coat with your hands.  Set aside.

Finely dice the red onion and the red and yellow peppers, saute in olive oil until soft.  Allow to cool.

This is an important step.  You want to remove any bones and excess skin, while leaving large chunks of salmon.  (Your kitty cat might enjoy these:-)  The bones are soft from the canning process.)

It should look like this...
Now add chopped parsley, the cooled pepper mixture, and lemon juice to the salmon.  Don't mix just yet...

Add the bread crumbs and gently mix.
Whisk the eggs, mayonnaise, mustard, salt and pepper together.  Add to the salmon mixture.  Gently fold all ingredients together.  

Shape into patties and coat with additional bread crumbs.  At this point you can bake or refrigerate if you want to serve them later.

Give each patty a light drizzle of olive oil and into the oven, 8 minutes per side.  Enjoy!
Salmon Patties


1 small red pepper, seeded and finely diced
1 small yellow pepper, seeded and finely diced
1 small red onion, finely diced
1 tablespoon olive oil
1 14 ounce cans salmon
2 tablespoons lemon juice
¼ cup chopped parsley
2 eggs
3 tablespoons mayonnaise, you can use light if you wish
1 teaspoon Dijon mustard
1 ½ cups unseasoned bread crumbs
½ teaspoon salt
¼ teaspoon pepper
Additional olive oil for drizzling

1) Preheat oven to 400’. Line a cookie sheet with non stick foil and drizzle with olive oil to coat, set aside.
2) Dice the red and yellow peppers, and onions. Heat a skillet over medium heat and add olive oil, peppers, and onions. Sauté for 8-10 minutes or until soft. Set aside to cool.
3) Open canned salmon and drain off excess liquid. Carefully remove the skin and bones, discard.  Add salmon to a medium size mixing bowl. Handle salmon as little as possible, you want nice large chunks in your patties.
4) Add the cooled pepper and onion mixture, parsley, and lemon juice to the bowl. Add 1/2 cup bread crumbs and gently mix.  In a small bowl, whisk the eggs, mayonnaise, mustard, salt, and pepper until well blended. Pour over salmon.  Gently fold ingredients together until everything is well blended.
5) Put remaining 1 cup of bread crumbs into a small bowl.  Form 4” patties with your hands and coat patties with bread crumbs. Place on prepared cookie sheet.
6) Bake for 8 minutes, then carefully give the patties a turn. Bake another 8 minutes. Makes 8 salmon patties. Serve immediately with fresh lemon wedges.  Enjoy!

*If you want to make ahead, prepare them all the way up to baking and refrigerate. Bake an additional one minute per side.
*If you’d like to spice them up, add minced jalapeno pepper when sautéing the peppers and onions or add a couple dashes of hot pepper sauce.

Enjoy!

Monday, January 3, 2011

What To Do.....

Hello Everyone-

Have we all recovered from all that time off with the kids?  Thank God school is back in session!  Geeze!  All my big guys did was eat and sleep....really....that's ALL they did!  I couldn't bear to see them horizontal another day.  School is good.

Anyway, I'm wondering what you all might want in terms of recipes?  Anyone have anything in particular they'd like to see?

Today I made Orange/Ginger Chicken with Jasmine Rice, in honor of The Orange Bowl....just kidding, purely coincidence.  I'm thinking that will be next. 

Have a great evening!
Angie

Saturday, January 1, 2011

Homemade Cheese Cake from Scratch.....

Cheese cake...simple...no fluff...creamy....gentle...not too sweet....most excellent simple dessert.  This is my Mom's recipe.   I grew up eating this delectable dessert.  I remember first hearing the name of the dessert and wrinkling up my nose....what?  Cheese in dessert?!  No way!

It is quite delicious with a fruit topping or chocolate gnache.  I recommend you enjoy it plain so you can really taste the cream cheese and the yummy graham cracker crust.  The recipe is really easy, it goes together in a matter of 15 minutes.  Refrigerate after completely cooling on the counter on a rack.  Try not to overbake as this will cause the top to crack. 

Homemade Cheese Cake

For the crust:
1 1/3 cups graham cracker crumbs
1/3 cup sugar
1/3 cup melted butter

For the filling:
2 8 ounce packages softened cream cheese
3 tablespoons flour
2/3 cup sugar
2 large eggs
¾ cup milk
1 ½ teaspoon vanilla

1) Preheat oven to 325’. Line the bottom of a 10” spring form pan with non stick foil. Spray lightly with cooking spray. (This will make for easy removal of the cake when it’s done.)
2) Combine the crust ingredients in a small bowl. Press into the bottom and up the side of the pan about ½”. Bake for 5 minutes. Remove from oven and cool on rack.
3) With an electric mixer, beat the cream cheese. Add the flour and sugar, beat well. Add eggs, milk, and vanilla, beat. Scrape down the sides and beat until all ingredients are incorporated.
4) Pour into pan. (it’s ok if it’s still a little warm) Bake in the center of preheated oven for 38-40 minutes. Do not over bake or the cake will crack in the center. To check for doneness, carefully tap the pan, if the center appears to be set, it’s done.
5) Cool completely before removing from pan. Carefully pull foil away from cake and place onto a serving plate. Enjoy with fresh fruit or chocolate.